Membres

Affichage des articles dont le libellé est Make It Crafty. Afficher tous les articles

lundi 19 août 2019

Playing with Copic Inks


Hello everyone! I'm back to share to share an inky make I created for my Copic Marker Europe post. I decided to have a play with my Copic Various Inks, I find it soooooo relaxing to just add drops of colour to paper and watch them mixing - I love it!


I used Transotype Synthetic Paper and put drops of BG09, 15, B04, 69 on it - I just let them act the way they wanted :)


Here is the result - I just keep playing until I like what I see. As you can see, I also usually use a piece of synthetic paper larger than what I really need, so that I can choose the part of the paper I like the most.


I cut my background and glued it to a white card base.


To decorate my background, I picked some Make it Crafty Chipboard - a Wreath Circle Frame, a Christmas Layered Word and a word from the Celebrate Adapt A Word. I coloured them using metallic pens for a bit of sparkle and white acrylic paint. I then covered them all in Star Dust Stickles.


I then glued everything to my background using Glossy Accents - and decided to add "It's" to have a well-balanced sentiment.


Thank you very much for your visit, have a great day! Hugs,
Delphine xx

samedi 22 juin 2019

Black and White Manga


Bonjour à tous! Je partage la mise en couleur que j'ai faite pour le blog Copic Marker Europe :) Pas besoin d'avoir des tonnes de Copic pour mettre en couleur une image, on peut faire du noir et blanc aussi, avec un nombre limité de feutres! J'en ai utilisé 7 et j'ai choisi la famille des C parce que j'aimbe beaucoup ces tons de gris froid mais on peut évidemment très bien utiliser les T, N ou W pour le noir et blanc.

Hello everyone! I'm sharing my post for the Copic Marker Europe blog today :) No need to have lots of Copics to colour an image, you can colour in black and white - and with a limited number of markers. I used 7 markers for today's post and picked the C family because I really like the Cool Greys but you can of course achieve the same look with the Ts, Ns or Ws.

J'adore les images manga et j'ai donc choisi un digi Make it Crafty, appelé Debbie's Surprise. J'ai imprimé l'image en 15 cm de hauteur - pour aller dans un de mes cadres.

My love of manga images is no secret so I chose a super cute Make it Crafty image to colour in black and white, called Debbie's Surprise. The image itself is 15cm high - meant to go into one of my frames, which is why I printed it that size.


Pour le noir et blanc, je commence toujours par la peau et les tons les plus clairs qu'on peut facilement rectifier et foncer si besoin. J'ai utilisé du C00, 0, 2, 4 pour le visage. J'ai d'abord délimité les zones les plus sombres avec mon C0 pour bien visualiser puis j'ai colorié du foncé au clair - de C4 à C0.

When colouring black and white, I always start with the skin and the lightest colours to try not to go too dark - once it is coloured, it's easier to go darker if you feel your skin needs to be darker rather than making it lighter!!! I used C00, 0, 2 and 4 for the face. I placed the shadows in C0 first to see where I wanted the skin to be dark and then coloured from dark to light - C4 down to C00.


J'ai fait le reste de la peau en C0, 2, 4. Si vous regardez bien, j'ai laissé un tout petit peu de parties en blanc sur le bord des bras pour rendre l'effet de lumière. J'ai aussi ajouté un peu de C2 sur les yeux pour l'iris et l'ombre sous les cils.

I then did the rest of the skin, using C0, 2, 4. If you take a close look, you will see I left some very thin white parts on the edges of the arms for light reflection. I also added a bit of C2 on the eyes for the colour of the iris and the shadow below the eyelashes.


J'ai ensuite fait les vêtements - un haut foncé pour un maximum de contraste. J'ai fait l'écharpe assez claire, mais un peu plus foncé que la peau. Pour le haut : C6, 8, 10 et l'écharpe: C2, 4, 6 (là où ma couleur de peau la plus foncée était du C4 pour quelques petites ombres. L'idée est d'utiliser vraiment toute la palette de gris et d'éviter des tons semblables sur deux parties côte-à-côte.

I then moved on to the clothes. I chose to go for a dark top, to have some contrast on the image. I did keep the scarf quite light, but still darker than the skin. 
The top was done using C6, 8, 10, and the scarf C2, 4, 6 (where my very darkest colour for skin was C4 in a few places for dark shadows). The idea is really to take the most of the range of tones and not use the same tones on elements that are side by side.


Enfin, les cheveux! Toujours en dernier pour moi ;) Je savais dès le début que je les ferai en noir - pour un maximum de contraste avec la peau. J'ai utilisé mes C6, 8, 10 comme pour le vêtement.

Hair - always last for me! I knew from the start I would make them black - strong contrast with the skin. I used C6, 8, 10 just like for her shirt. 


Et voilà le petit cadre pour mon atelier :) Merci de votre visite et bonne journée! Bises,

And here it is framed for my craftroom :)! Thank you very much for your visit, have a great day! Hugs,
Delphine xx

vendredi 19 avril 2019

Make it Crafty Ashlyn


Hello everyone! I'm back to share a Copic card I made for the Copic Marker Europe blog, featuring a beautiful Make it Crafty image called Ashlyn.


I cropped my image to keep only the upper part of Ashlyn and then quickly coloured the background using B69, making quick circular movements since the idea here was not to have a smooth background.


Next I coloured the skin using YR000, 00, 01 and RV02, as shown by Zoe from Make it Crafty in her Basic Techniques when Colouring Faces Ebook. For the eyes, I used B00, 02, 60, 63. I also added a bit of B63 to the skin.


I then did her clothing, keeping the same tones as my background - so I used B63, 66, 69.


I then coloured the hair strand by strand starting on the left of my image, in E49, 57, 59 and YR23.


To make the background a bit smoother, I added Blueprint Sketch and Chipped Sapphire Distress Inks on the edges. With a Kraftin' Kimmie Starbust Stencil, I drew stars in a gold gel pen. I also wrote a little sentiment on a strip of paper that I put on foam. Here is the recap of all the Copics I used:

Skin: YR000, 00, 01, B63
Eyes: B000, 02, 60, 63
Hair: E49, 57, 59, YR23
Clothes: B63, 66, 69
Background: B69


Thank you very much for your visit, have a great day! Hugs,
Delphine xx

lundi 1 avril 2019

Make it Crafty Fairies Blog Hop


------------- Winners Update ------------------------------------
Congratulations to our three winners, randomly selected from three different blogs along the way. 


Sandra from Nicoletta's blog
Fabulous coloring, love the new digi's!!! Adorable!

Marjeta from Rosie's blog
As always amazing colored image. Whole card is fantastic.

Henriëtte from Delphine's blog
Ohh WoW Delphine, what a stunning colouring on this awesome Fairy. I love that you put her in a frame, it also would be a lovey pressent this way. Thank you so much for sharing.

Please contact Zoe via http://www.makeitcrafty.com/contact-us.html and let her know which one is your favourite fairy.
-------------------------------------------------------------------------------


***BLOG HOP CLOSED***

Yay! We are so excited to share the gorgeous new Flower Fairies from Make it Crafty with you. It has been quite a while since we've released new images, that we thought it was worthy of a blog hop and of course a give away. :)

It's just a quick hop, with of course gorgeous colouring to inspire you, so be sure to leave a comment on each blog post so that we know you 'hopped' on by. PLUS there are three secret giveaways along the way and if you win, you will be able to choose to keep your favourite fairy!

So without further ado, let me show you what I have made using Fairy Bluebell :)


Well I fell in love with this fairy! Once I coloured her, I decided not to put her on a card but thought she would look nice in a simple frame :)

I flipped the image and cropped her then coloured her in Copics.


Colouring: Copics on Make it Colour Blending Card

Skin: E000, 00, 11, 71
Eyes: BG01, 02, B63
Hair: E25, 49, 59, YR21
Wings: BG000, V000, Y000
Dress: B63, 66, 69
Stick: E25, 59, Y26
BG000, V20, Y000, 11, 26

Thank you so much for joining us on this fun little blog hop and I hope you'll have a quick chance to leave a comment before you continue hopping. I may just be the lucky one hiding a little fairy for you. ;)

Blog Hop List


Of course if you can not wait to find out if you are a winner, be sure to head on over and snap up your favourite fairy now and Zoe will be more than happy to refund you should you win!
Hugs,
Delphine xx

dimanche 6 janvier 2019

Make it Crafty Melyssa


Hello everyone! I'm back to share my first Make it Crafty inspiration post for 2019 :) I have decided to make a happy card, with flashy colours to start the new year! For my card, I used one of the Dreamy Eyes Portraits - the sweet Melyssa.


I printed Melyssa on Make it Colour Blending Card, die cut her with a Lawn Fawn die and coloured her in Copics. I started with the background and then coloured my character. Once all the Copic colouring was done, I applied a bit of Distress Inks around the edges of my card (Dusty Concord and Chipped Sapphire). I then added a chipboard sentiment, combining a Love Word Chipboard  and the "sending" from the Sending Adapt-A-Word Chipboard Set. I used white acrylic paint to colour them, a pink Copic for the love base word and I also added Mini Hearts Chipboard Tinklings, coloured with a pink Copic too.


Copics used:
Background: V15
Skin: E11, 70, 71, R20, V22, YR000, 00
Hair: E25, 59, Y11, 26, YR21
Pink: RV13, 14, 17, 19


Thank you very much for your visit, have a great day! Hugs,
Delphine xx
vendredi 21 décembre 2018

Make it Crafty Angel


Hello everyone! I'm back with some Christmas inspiration - yes, it is just around the corner now - with a card I did for Copic Marker Europe.
For today's card, I have used an adorable image by Make it Crafty called Angel and Cherub (it comes as 2 images that you can use separately). I resized and cropped my image in MS Word, printed it and coloured it on my piece of paper without cutting it.
I wanted to make my image pop so I decided to create a flashy pink background and used blue on my image. 


I started with the background, coloured making quick circles in RV25 - we are not aiming at having a smooth blended background here - a technique I learned from Zoe at Make it Crafty. 


I then coloured the skin of my angel, using E000, 00, 11 and 71 for the shadows. I also added a bit of R20 for the cheeks and used B63, BG01, 000 for the eyes. 


For the clothes, I used B02, 04, 16, 37, 39.


I then coloured the hair in E59, 25, YR23 (in that order) and coloured the halo in Y11, 26, E57, and the wings in B63, BG000 and a touch of V000. 


To add even more depth to my image, I used my Polychromo pencils on the hair, bow and clothes. I then cut my image and went around the edges with a blending tool and Picked Raspberry Distress Ink.  


I thought I would add some details to the background, so I stamped a few leaves and the word JOY with a Marianne's Designs alphabet set in black ink. To brighten things a bit, I did some doodling with a white gel pen. And voilà! 

Skin: E000, 00, 11, 71, R20
Hair: E25, 59, YR23
Eyes: B63, BG000, 01
Clothes: B02, 04, 16, 37, 39
Wings: B63, BG000, V000
Halo: E57, Y11, 26


Thank you very much for your visit, have a wonderful Christmas everyone! Hugs,
Delphine xx

mercredi 21 novembre 2018

Oh Copic Various Inks!


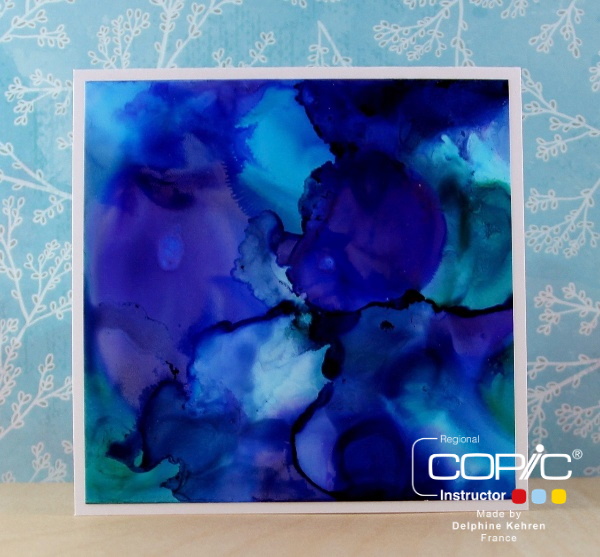
Hello everyone! During the Instructors' Meeting in Germany, we were lucky to have a workshop with Kathrin Bartholomäus who makes beautiful fluid art and we got to play with our Copic Refills. I love the effects you can get, so I decided to play a bit for my Copic Marker Europe post:)

The basic supplies for that are Yupo paper, Alcohol (I used 95% Alcohol) and Copic Various Ink Refills.

I cut my Yupo into 4 pieces of paper (about the size of an ATC) and randomly added Inks and alcohol to my paper.


Blue card: B37, 69, BG05
Aqua card: B37, BG05, 09
Purple card: RV02, V09
Red card: R20, 37, YR04 (and Q tips to remove some colour)


I then coloured a cute little dog by Tiddly Inks (Holly Jolly Christmas) in Copics, three times for my cards. 

Dog: C0, 1, 3
Hat: C7, R35, 37, 39, W0, 1, 3
The holly was done in gel pen.


I decided to use 2 of my Yupo cards without touching the backgrounds - I simply put my dog on foam squares, added Make it Crafty Chipboard coloured in acrylic paint and added a bit of gold on the edges of my first card and white for the second card with an acrylic marker.

Make it Crafty Chipboard used:


For my purple card, I thought I would make a simple scene. I used white acrylic paint for the snow at the bottom (the white can be a bit tinted by the ink underneath but I don't think it is a problem). For the trees, I used a black Pitt pen. I added a few snowflakes in acrylic paint and a bit of white on the edges of the card for a frosty look.


For the red card, I added gold acrylic paint on the edges of the card and a few gold dots and chose to only add a big Make it Crafty Merry Christmas Outline Sentiment Chipboard painted in acrylic too.

And here are my four little cards together:


Thank you very much for your visit, have a fab day! Hugs,
Delphine xx

mardi 6 novembre 2018

Tiddly Inks Challenge #219


Hello everyone! It's the start of a new challenge at Tiddly Inks and our them this time is DIVINE DIMENSION! So think images on 3D foam, moving parts, shadow boxes, etc...!

For my card, I decided to make a Christmas card using Wryn Santa Girl :)


Image: Tiddly Inks Wryn Santa Girl
Colouring: Copics on Make it Colour Blending Card
Chipboard: Make it Crafty Shooting Stars Rectangle Frame and Christmas Word Chipboard
DPs: Bo Bunny

Skin: E000, 00, 11
Hair: 100, BV04, C7, 9
Red: C7, R35, 37, 39
White: W0, 1, 3

My Shooting Stars Rectangle Frame was coloured using the chisel nib of my C9 Copic marker. The gold is acrylic paint and the red is gel pen. Same thing for the Christmas Word :)

We hope you can join us HERE too! Thank you very much for your visit, have a great day! Hugs,
Delphine xx

samedi 9 juin 2018

Kraftin' Kimmie Saturday Challenge #434


Hello everyone! Today is the start of a new challenge at Kraftin' Kimmie Stamps and our challenge this week is "WATER"! Submit your krafty design for your chance to WIN! You have until Friday June 15th to enter! All entries are welcome but you must use a Kraftin' Kimmie Stamp in order to win.

Each Saturday we post a new challenge and you can enter as many times as you'd like. One winner per month will be drawn from all Saturday Challenge entries to win a $40 Gift Voucher to the Shop!


And be sure to hop to the Shop because our FRUGAL FRIDAY SPECIALS are up with FOUR of our stamp sets on 40% OFF! And our Wednesday Inspirational featured set is on sale too!

Not only that... we've just rereleased our FAIRY TRINKETS Stamp Set in natural red rubbah and they are fabulous cards, tags, boxes, planner pages and MORE!


Here is my make for today, using Keep Swimming:)


Stamps: Kraftin' Kimmie Stamps Keep Swimming
Colouring: Copics on Make it Colour Blending Card, Distress Inks on Canson MM, Sakura and Pentel gel pens
Chipboard: Make it Crafty Delicate Ornate Circle Frame and Alpha Mini Caps
Other: MFT Dies, Doodlebug DPs

I stamped the cute girlie from the Keep Swimming set, coloured her in Copics and cut her out. On a piece of Canson MM paper, I put Distress Inks and sprayed a bit of water on it. I picked a pink Doodlebug DP for my make and used a Make it Crafty Delicate Ornate Circle Chipboard Frame that I coloured in Sakura and Pentel gel pens. I then added a Hi sentiment using MiC Alpha Mini Caps.


Skin: E000, 00, 11, 13
Hair: 100, C7, 9
Pink: RV14, 17, 19
Green: BG23, 49, 57

We hope you can join us with your WATER creations! Have fun! Hugs,
Delphine xx

Make it Crafty Siren of Pearls


Hello everyone! I'm sharing my make for our current challenge at Make it Crafty - ANIMALS! Mermaids are part animals, so since Zoe challenged me to colour scales for our challenge, I picked one of my favourite mermaid ever - Siren of Pearls.


I printed my Siren of Pearls on Make it Colour Blending Card and coloured her using Copics. I decided to match her to one of my beloved chipboard frames, a Delicate Ornate Circle Frame, which I coloured using a bronze Posca marker. I also added a Hello word chipboard sentiment, coloured with the same Posca marker and a blue gel pen. The DPs I used are by Doodlebug.


Skin: E000, 00, 11, RV02
Eyes: B02, B63
Scales: B63, 66, 69, BG13
Hair: E25, 59, YR21

To create the scales I did tiny dots with my Copics, starting with my darkest colour, B69, and going lighter as I widened the coloured area, to B66 then B63. I left some parts uncoloured and coloured them at the end in BG13.

I hope you will give our challenge a try! Thank you very much for your visit, see you later! Hugs,
Delphine xx