Membres

Affichage des articles dont le libellé est Airbrush. Afficher tous les articles

lundi 6 mai 2019

Krafty Tutorial - Savannah!


Hello everyone! I'm back to share a step-by-step tutorial on a savannah scene make. I have used a super sweet giraffe from the Kraftin' Kimmie Wild World set and decided to give it a background.

Bonjour à tous! Petit tutoriel aujourd'hui, je vous emmène dans la savane! 


I die cut a piece of paper and airbrushed it using my Copics. I used YR07, 16 then Y15, 11 to suggest a sunset scene.

J'ai utilisé une découpe Lawn Fawn et créé un fond avec mon airbrush et mes Copic YR07, 16 puis Y15, 11.
  

I then drew a background, using the chisel nibs of my C7 and C9 to create the ground, then I doodled the rest in Copic multiliners. For the blades of grass in the foreground, I used my Copic Small Brush Multiliner.

J'ai ensuite dessiné une scène, avec les pointes biseautées de mes Copic C7 et C9 pour le sol, puis j'ai dessiné les formes au Multiliner. 


I stamped the giraffe from the Wild World Set in Wicked Black Hybrid Ink, did some fussy cutting and coloured it in Copics. Quick tip: I coloured the whole body without paying attention to the dark "spots" of the giraffe, much easier to place the shadows than going around all the little details ;)! On the photo above, I used E41 and E50 only - you will see the rest of the colouring below!

J'ai tamponné puis découpé une girafe rigolote du set Kraftin' Kimmie Wild World Set et je l'ai coloriée au Copic. Plutôt que d'éviter les taches de la girafe, j'ai placé mes ombres et fait le blanc en coloriant par-dessus les taches. Juste du E41 et E50 ci-dessus - voir ci-dessous pour la colo en entier:)


I put my savannah background on a card base, then added my coloured giraffe on foam pads for a bit of dimension. Here are all the colours I used:

Giraffe: E29, 41, 50, 99, W1, 3
Background/ Sky Y11, 15, YR07, 16
Background/ Black: C7, 9, Copic multiliners

J'ai collé mon fond et ajouté ma girafe sur carrés mousse pour un peu de relief. 
Girafe: E29, 41, 50, 99, W1, 3
Fond/ Ciel:Y11, 15, YR07, 16
Fond/ Noir: C7, 9, Copic multiliners


And I thought why not put a frame? That would make a nice gift! 

Et finalement, j'ai mis un cadre pour faire un petit cadeau sympa ;)!

Thank you very much for stopping by, have a great day everyone! Hugs,
Delphine xx

lundi 8 octobre 2018

Krafty Tips and Tuts - Airbrushed Scene with Masking


Hello everyone! I'm sharing a little tutorial today - a simple scene with masking and airbrushing!

For my character, I picked a cute sweetie from the Kraftin' Kimmie Stamps Halloween Lulu set, just rereleased as rubber. I also used the KKS Spooky Silhouettes set, a fabulous set to create Halloween scenes!


I stamped my character in Wicked Black Hybrid Ink on my Copic card and on a Post-It to mask her.


I then stamped a tree from the Spooky Silhouettes set three times. 


I then placed a mask to mimick a hill.


I airbrushed the sky RV23 and 66 starting from the bottom and then I started from the top with YR18 then YR04.


I used the other part of my mask to then cover the sky and create the hill. I used G29, YG03, 67. 


Next I coloured my sweetie in Copics and went back on the trees with a black Copic multiliner to make them really black.

Skin: E000, 00, 11
Hair: BV04, C7, 9, 10
Outfit: C5, 7, 9, 10, R35, 37, 39
Pumpkin: Y35, 38, YR04, 18 


And lastly, I coloured a tiny piece of paper in YG03 and stamped a Halloween sentiment from the Spooky Silhouettes set, and voilà! 

Hope you found this little tutorial helpful! Have a great day everyone! Hugs,
Delphine xx

dimanche 19 août 2018

August Release Krafty Hop


  Hello everyone! Today we are celebrating the amazing release of all of our new August stamp sets at Kraftin' Kimmie Stamps! All FIVE new sets, THREE new Krafty Kolours Inks and TWO Halloween Rubber Rerelease are now available in the Krafty Shop! So let's have a hop and check them out in action! First up are two fang-tastic sets from artist Emilie Goulet, called HAUNTED HOUSE and SPOOKY SUCKERS! Next up are two solid image stamp sets from artist Melissa Baker-Nguyen called GRATEFUL PUMPKINS and SPOOKY SILHOUETTES! Lastly, we have a set of aliens by artist Cheryl Grant... OUT OF THIS WORLD! 

You can also now purchase HALLOWEEN TRINKETS and SPOOK-TACULAR SENTIMENTS rereleased as rubber!  And our trio of fall Inks... Pumpkin Spice, Purple Petunia and Mossy Meadow!  


All the new sets are available individually but if you have to have it all, we also have our August Gimme Kimmie's Kit which includes all five of the new stamp sets together and at a discount! Plus a couple of add-on options featuring our new ink trio!  

Here is my make for today :)


Stamps: Kraftin' Kimmie Stamps Spooky Suckers, Grateful Pumpkins, Spooky Silhouettes
Colouring: Copics on Make it Colour Blending Card
Ink: Kraftin' Kimmie Wicked Black Hybrid Ink

I stamped my vampire in Wicked Black Hybrid Ink, did some fussy cutting and coloured it in Copics. For the background, I stamped a tree from the Spooky Silhouettes set twice, a moon, a ghost and a sentiment from the same set and I added a pumpkin from the Grateful Pumpkins set. I then airbrushed the background.


Sky: V04, 06, 09, YR61
Grass: BG72, 78, YG00
Vampire: Skin: C0, 1, 3, E000
Hair: 100, BV04, C7
Cape: C5, R35, 37, 39
Black: C5, 7, 9
Shirt: C0, 1, 3
Gold: YR24

Happy hoppin'! Hugs,
Delphine xx

samedi 1 octobre 2016

CAS Copic Airbrushing


Hello everyone! I'm back to share a CAS card with simple airbrushing I made for Copic Marker Europe. I love the look you get with the airbrush and it is a nice simple way to add colour to your backgrounds. 


I used an image (and sentiment) from the MFT Beary Special Birthday stamp set which I coloured with my Copics then cut out. I cut a rectangle the size of an ATC because it's a format I like and airbrushed it using different Copics starting from the bottom of the rectangle. I then put my image and sentiment on foam squares for a bit of dimension and added a few Papermania Dots. 


Bear: E25, 27, 29, 40, 41, 42, 43, R20
Red: R35, 37, 39, 89, T5
Gold: E33, Y11, 21, 26
Background: Y15, YG05, YR61, V04


Thank you very much for your visit, have a great day! Hugs,
Delphine xx

mercredi 14 septembre 2016

September Krafty Peeks... Day THREE


Hello everyone! Welcome to Day THREE of our September Krafty Peeks at Kraftin' Kimmie Stamps! Today we are sharing a second fabulous new set from artist Becky Pearce! This one is an add-on to the set from yesterday! It is called SHAKE IT UP - POLAR BEARS

This sweet 4x4 clear stamp set is full of roly poly polar bear images with lots of accessories and gorgeous sentiments! You can use it on its own or in addition to the Shake It Up Snowglobe stamp set from yesterday's peeks for an endless combination of possibilities! There's a total of SIXTEEN stamps in this adorable set!!


Below you'll find links to all the Krafty Girls' and Guests' creations and while you're visiting the blogs, be sure to comment and leave some love because one lucky krafty person is going to WIN a gift card to the shop

Here is my card for today :)


Stamps: Kraftin' Kimmie Stamps Shake It Up Polar Bears
Colouring: Copics on Make it Colour Blending Card
Dies: MFT

I stamped and coloured all my elements on Make it Colour Blending Card and coloured them in Copics, then cut them out. For the background, I die cut a circle and airbrushed it using 3 Copic colours, and I created a white panel for the ground using MFT dies. I stamped and embossed the sentiment in white and added a few snowflakes in gel pen.

All of our new September clear stamp sets will be released on Saturday night after the LIVE Online Release Party beginning at 6pm EST! We'll be checking out all the NINE new clear stamp sets! Come join us to help celebrate the new release, have a chance to win some prizes and just have fun with us! Hope to see you there! Happy hoppin'! Hugs,
Delphine xx

jeudi 5 novembre 2015

SCACD Digital Stamps Release!


Hello everyone! SCACD is celebrating 10 newly released exclusive digital stamps. There are some new cute animal stacks think kitten, puppies and birds as well as some Steampunk additions and more!!! So check out the collection as these are really cute, fun and unique. SCACD Artist Carmen Medlin and Susana collaborated on the images and we are happy to be showcasing them to you now :D
Now available to purchase in the USA HERE
All Our EU International Friends can purchase them HERE
If you are a non EU country, you can purchase direct from SCACD HERE

Here is my little make featuring the adorable Puppy Stack - I just can't resist such cuteness, love at first sight!!!!!!


Image: SCACD Puppy Stack
Colouring: Copics on Make It Colour Blending Card

I printed my puppy stack twice, once for the base of the card with the sentiment, and one to colour with my Copics and cut out. I airbrushed the card base then added my coloured puppy stack to it. 

You should be going next to PENNY :) If you want to make sure you saw all the designers showcasing the stamps, then head back to the SCACD Store Blog HERE!
And please note SCACD is having a SALE, so check it out HERE
Thank you very much for your visit, have fun hopping! Hugs,
Delphine xx

samedi 25 juillet 2015

DoveArt Studios Fall Release!


Welcome to the DoveArt Studios Fall release!

Passionate Paper Creations and Friends FB is hosting a fun weekend and CC DesignsRubber Stamps is giving away some great prizes!  If you haven’t joined PPC&F FB page you will want to do it now so you can see all the fun going on today! It's always a party on this group and you don't want to miss out! The whole DoveArt-istic DT has some amazing things to share with you and we are all excited with the NEW DoveArt Studios Fall release.

The DT will be sharing their creations all day in the Passionate Paper Creations and Friends Facebook group and you get to hop around and answer fun questions for 9 chances to win some of the new release, a die and stencil donated by CC Designs!
Winners will be announced on Sunday July 26th on the Passionate Paper Creations and Friends FB page.

Using a DoveArt Studios rubber stamp, I have created a little Fall card :) The stamp I chose is called Web Background - you know how much I love backgrounds and this stamp is one that you will see me use a lot, it will work to perfection with all  Halloween spooky (or not) characters!


Stamps: DoveArt Studios Web Background and CCDesigns Meoples Ghost Boo
Colouring: Copics on Make It Colour Blending Card

I stamped my background and decided to airbrush it - in purple of course ;) I thought I would pair it with a stamp with a spider on it and picked my CC Designs Meoples Ghost Boo, coloured in Copics and put on foam squares for a bit of dimension.

Background: V09, 15, 17
Ghost: C0, 1, 3, Y000
Letters: C0, 1, V0000

My fun question to you, for your chance to win one of the wonderful prizes of a NEW release stamp, a random stencil and die is:

What's your favourite candy/sweet?

Just leave your answer in the comments below and head back to PPC&F for more fun through out the day.  You will want to check back to Passionate Paper Creations and Friends tomorrow to see if you are a winner.  

Here are quick links:

Places to Purchase DoveArt Studios stamps

Thank you very much for your visit! Hugs,
Delphine xx

lundi 8 juin 2015

CC Designs Copic scene


Hello everyone! I'm back to share a summer card I made for Copic Marker Europe - a simple scene done with a stamp, a stencil, my airbrush and of course my beloved Copics!


The cutie I have used is called Pina Colada by CC Designs from the June release. I stamped her in Memento Tuxedo Black, coloured her in Copics and then cut her out. 

For the background, I used a piece of drawing paper instead of smooth card to have a bit of texture, because I really like how the airbrushing looks on it. I chose a CC Designs stencil called Sun And Surf, which includes the sun and the waves. I airbrushed the sun first, starting with my lightest colour to be able to go darker then and not make the mistake of starting too dark. I then used a darker shade of yellow and ended by adding a bit more of my lightest yellow. 
For the waves, I picked different shades of blue, did the waves with my stencil and put a paper mask to create the horizon. I then stamped a sentiment from the CC Designs Pool Party sentiment set.


Skin: E000, 00, 01, 13, 71
Hair: 100, B41, T5, 7, 9
Dress: RV04, 06, 09, Y35
Shoes: C1, RV06, 09, Y19, 15, 26
Sun: Y15, 38
Sea: B01, 04, 06, 18

Thank you very much for your visit, have a lovely day! Hugs,
Delphine xx

vendredi 29 mai 2015

Paperbabe Stamps Challenge #13


Hello everyone! Today is the start of a new challenge at Paperbabe Stamps and our theme this time is "BRIGHTS"! We would love to see your Paperbabe Stamps but all brands are welcome and you can use any stamp you like! 

Here is my little scene card for today :)


Stamps: Paperbabe Stamps DesignA Adorimals, Kawaii Face and Bottle Brush Tree stamp sets, Penny Black and Tiddly Inks sentiment
Colouring: Copics on Make It Colour Blending Card and Airbrush

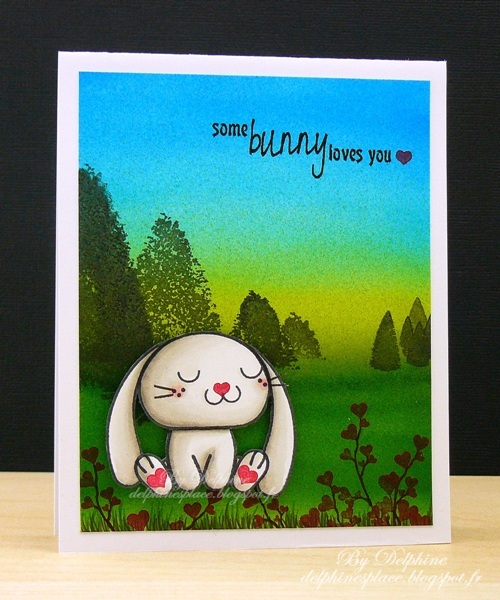
Rabbit: R20, W00, 0, 1, 3
Background: B02, 04, 06, G29, Y15, YG01, 03, 63, 67

To create my little rabbit, I used the DesignA Adorimals stamp set and stamped all the parts of the body, then added face features using the Kawaii Face set. These sets contain a ton of stamps offering a huge number of possibilities to create the animals you want! I cut out my rabbit and airbrushed a background on another piece of paper, then added trees from the Bottle Brush Tree set and a few branches. I then popped my rabbit on foam squares for a bit of dimension. 


Challenges I am entering:
Aud Sentiments - Cute + sentiment
Cute Card Thursday - Too cute
Addicted To Stamps - Anything Goes
Crafty Gals Corner - Critters

Don't forget to visit my teamies for more inspiration HERE and we hope you'll come and play with us! Hugs,
Delphine xx

jeudi 14 mai 2015

MiC Clean and Simple Challenge #1


Hello everyone! I shared a little sneak peek of this card earlier in the month, for our first Clean and Simple Challenge at Make It Crafty! The theme is "Background Technique" and for great inspiration, you can look at my teamies' work HERE

I love adding backgrounds and this one was done with a stencil, a paper mask and my airbrush :)


I used Beautiful Leia digi and thought she needed a happy sunny background. To do it, I used a Memory Box stencil, secured it with washi tape and added a paper mask I cut to create the hill. I airbrushed the sun, then removed the hill mask and covered the sunny airbrushed area with the negative part of the paper mask I used to do the hill. I then embossed a sentiment in white. 

Beautiful Leia was printed on Make It Colour Blending Card, coloured in Copics, cut out and put on foam squares. 


Skin: E000, 00, 01, 13, 71
Hair: E49, 55, 57, 59
Eyes: E31, BG000
Dress: R00, 02, 05
Sun: RV02, Y15, 39
Hill: YG01, 03, 17, 67

Thank you very much for your visit, hope you can join us HERE!! Hugs,
Delphine xx

dimanche 12 avril 2015

Paperbabe Stamps new Challenge!


Hello everyone! We have a new challenge for you at Paperbabe Stamps and this time our theme is "Masquerade" - think of masks, masking images, backgrounds... and remember, you can enter using any brands of stamps;)! 


Stamps: Paperbabe Stamps Mayleedee Kimono and Little Red (sentiment), Kaisercraft background stamp
Colouring: Copics on Make It Colour Blending Card

I stamped Mayleedee Kimono With Fan on Make It Colour Blending Card, masked her and airbrushed the background. I then used a background stamp several times  and added the sentiment from the Paperbabe Stamps Little Red Stamp

We hope you will join us! Thank you very much for your visit, enjoy the rest of your day! Hugs,
Delphine xx

vendredi 10 avril 2015

Tiddly Inks Fab Friday and Airbrush :)


Hello everyone! It's Fab Friday at Tiddly Inks and the DT are sharing their makes with you! For today, I have used one of my all time favourite stamps, the adorable Fairy Tenderhearted and after looking at Sandy's awesome blog where she shares fantastic videos with her Copics and airbrush, I decided I would take out mine for today!


Stamps: Tiddly Inks Fairy Tenderhearted (also available HERE from Quixotic Paperie), Paperbabe Stamps Mayleedee Little Red (sentiment)
Colouring: Copics on Make It Colour Blending Card (Daler Rowney for the airbrushed background)
Other: Versamark, white embossing powder, Airbrush

I coloured Fairy Tenderhearted on Make It Colour Blending Card and cut her out. For the background, I did my airbrushing on Daler Rowney paper, stamped my sentiment in Versamark and embossed it in white. 

Challenges I am entering:
As You Like It - Favourite Alcohol Markers or DI Inks (definitely Copics, nothing blends like them and the colours are so vibrant!)
Take It Make It - Take A Technique: Colour (#2)
Papertake Weekly - Anything Goes

Don't forget about our Tiddly Inks challenge which is "Anything Goes" this week! 
Thank you very much for your visit, see you a bit later today! Hugs,
Delphine xx

vendredi 13 février 2015

Quixotic Paperie info: The NEW Tiddly Inks are in :)!!!


Hello everyone! The NEW Tiddly Inks stamp release have reached Quixotic Paperie!!!! YAY!! Have you ordered yours? The choice is difficult, I agree ;)!!! Maybe I can help by sharing a simple 100% Copic card I made for Copic Europe featuring one of them! I have made the most simple background and used Cute As A Cupcake - because who doesn't love cupcakes!!


I stamped this cutie from the Cute As A Cupcake stamp set on Make It Colour Blending Card and coloured her with my Copics. I also coloured the little heart which comes with the set. I cut everything out to pop my elements on foam squares my background - a very simple one I did using my beloved airbrush, once I had masked the borders of my card to leave a white frame around.


Skin: E000, 00, 01, 11, 70
Hair: E53, 55, 57, 59
Dress: BG000, 01, 02, 05, C1, Y11, 21, 26
Shoes: BG000, 01, 02, W0, 1
Table: C0, 1, 3, R81, 83, 85, 89
Cupcakes: E31, 33, 35, 37, R00, 02, 22, 24, 81, 83, 85
Background: R20, RV02, 04

Thank you very much for your visit, have a lovely yummy day everyone! Hugs,
Delphine xx

mercredi 17 décembre 2014

Season's Greetings for Copic Europe


Hello everyone! I'm back to share a Christmas card I made for Copic Marker Europe - now is really the time to make winter cards says the panicked girl;)!!!


I have used one of my not so recent Penny Black stamps called Snowy and Hedgy. I stamped it on Make It Colour Blending Card and masked my image, added a couple masks to create the hills and airbrushed the background. I then coloured my scene and thought I would add a frame inspired by a number of cards I have seen recently. I cut a rectangle with a die, stamped a sentiment from the CC Designs Christmas Sentiments II set on it and put it on foam squares.


Sky: B00, B41, BG000, BV00
Hills: B00, C1
Snowman: 100, BG000, C0, 1, 3, Y17, YR04
Hat: R35, 37, 39, 89, W0, 1, 3
Scarf: B95, 97, 99, R35, 37, 39, 89
Hedgehog's Skin: E000, 00, 21, E70
Fur: T0, 1, 3W1, 3, 5


Challenges I am entering:
Penny Black And More - Special Occasions (entry 2)
Stamping Sensations - Winter Wonderland

Thank you very much for your visit, have a great evening! Hugs,
Delphine xx